
Yes, it had to happen. At some point in a crafter's life, one has to give in to the impulse to use cold water dyes. I've done silk painting and dye work in the past, but that was different. There, you just pour premixed dye, heat set the fabric in a steamer and rinse. Done!
With fiber reactive dyes, there is chemistry involved!
That chemistry, though not really difficult, had put me off for quite some time. Some of the reason is that in every book or article I've read about how to mix up the chemicals and dye, the proportions for each ingredient were different. If no two authors agreed, how was I to choose what to do???
In doing my research using 6 different tie dye books, or booklets, and a two CD instruction models, not one of the authors agreed on how much dye should be used to make the stock dye solution. Nor did they agree on how much Urea should be added.
 I kept reading, taking notes, comparing and so on for quite a while. Eventually, after buying all my supplies at www.dharmatrading.com , I just found a Saturday when I was completely alone with nothing to do and I set about this task.
I only used a few rubber bands on each article of clothing to keep things simple and decided to just do an ombre effect with one color of dye, going dark to light on the fabric.
This little set is a size 6 Toddler, 100% cotton, lettuce edge top and pants. It was easy to lay each piece down and dab the dye on with a sponge brush. I wrapped everything up in big plastic bags and waited, impatiently, for 24 hours before the big rinse in hot, hot water.

As it turned out, I really liked the process and the results! It was a lot of work, but it was also fun!
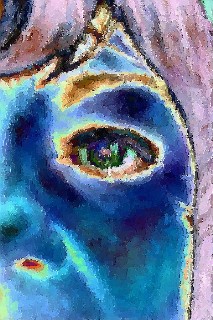
This tee for our newborn grandson shows a close up of the ragged heart applique that I sewed onto three of the outfits I dyed.
I made these by digitizing the design on my Janome embroidery software and then machine embroidered them out on my Janome 10000 as free standing appliques.
Hand sewing them onto the soft dyed cotton was very satisfying.
I did three colors that day. This is peacock blue. It truly is a beautiful color.


3 comments:
Chemistry is our friend! And probably all the books are correct. when in doubt, follow the directions on the dye you purchase. Have you tried anything more this month?
Thanks for stopping bye, Jennifer. This stuff is definitely a chemistry lab, and I have made several more trys at it, but haven't taken photos of the products. Sometimes I just want to get my little gifts in the mail!
Hi Adrian,
My daughter is graduating from rabbinical school this year and I want to make her a tallit. I am also a mohelet and would like to make some wimpels for bris ceremonies.
I just purchased a Pfaff Creative Vision sewing machine and am a novice at machine embroidery. Do you still have the graphics you scanned for the tallit you made for the baby naming? Would you be willing to share them? There is so little available for Judaic machine embroidery patterns that it seems to be mostly a "make your own" endeavor.
Thanks,
Carol
Post a Comment