Sunday, August 23, 2009

Lesson 67 - A Course In Miracles Card

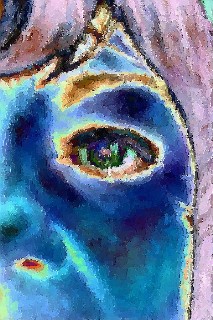
Front of watercolor paper card-

Inspired by lesson 67 of the workbook in "A Course In Miracles", this quote is an easy one to meditate on.

"Love created me like Itself."

1. "Today's idea is a complete and accurate statement of what you are."

This is the first line of the lesson and really completes the thought, don't you think? In reforming my ideas about myself, I can remember it, ponder it, look at myself anew and more forward more peacefully.

This is the first weekend in a long time where I didn't do one single creative thing - until 9:30 P.M. Sunday night when I made this card.

I did laundry. I watched art making videos and took notes. I walked 40 minutes and had a nice swim afterwards in our deliciously warm pool on Saturday and Sunday.

I did more laundry and thought about all the things I could/should be doing. I napped. I started reading a new historical novel, a five pounder on the life of Cleopatra.

I did more laundry. Napped again and put together really simple dinners for us.


Back of card -

Spray watercolor - turquoise. A heart outlined with water soluble oil pastel and finger smudged.

Some weekends are just meant to be restful and this was one of them.

I used a calligraphy pen to write the quote, its' source and my name.


Inside of card -

I did some sewing around the letters with gold metallic thread and it shows up on the inside. I leave long tails of thread hanging.

I like the messy look. Something alien to a seamstress such as me. My Jr High School sewing teacher would not give me an "A" for this, but she might like the colors!


This is the front of the envelope.


I left some paper bare for the address, but really like the way the watercolor dots and drips all over.


The back of the envelope-

Here is the turquoise in all its sprayed and drippy glory with the stamped letters on a old book page.

I have several copies of Reader's Digest in my garage/studio that I have used for many years to lift up from the table, the silk stretching frames I used when I hand painted silk for the prayer shawls I used to make and sell. The pages are nice and yellow now and make a great background for stamping.

It's been hard for me to switch from my sewing machine and fabric paints to paper and crayons, but I am beginning to like what I am doing. And, now, as I post this, I can go into the coming week not feeling as if I wasted two whole days.

Sunday, August 09, 2009

Pink-Orange-Green Heart Card

Front of Card -
A happy combination of colors went into this card; pink, orange and green! 140 lb watercolor paper card set was sprayed with pink watercolor paint. See the drips! Don't you just love the drips?
Next, a swath of orange acrylic paint, followed by stamping a green heart with a hand made stamp. Hearts are easy, peasy to carve and I never get tired of making new sizes and shapes.
On top of the green is a heart I cut out of hand colored, stamped, and journaled paper that I sewed on with black thread. See all the loose thread hanging down? Oh, but my 7 th grade sewing teacher would have a fit to see such a mess!
I balanced the collage with more paper scraps and a deeply purple jewel. Sigh.
The last step was to sew a zigzag stitch using my favorite gold metallic thread. More loose threads all over the place.
Being messy is so SatiSfyinG!
This is the envelope.
I used the negative from cutting out the heart and glued it over another handmade green colored paper so I could write a legible address.

This time I had to be careful about sewing because I wanted the card to be able to go inside, so I just added gold metallic to the upper edge and did a couple of start/stop/pull threads out and cut so I would have lots of thread hanging around.

This will require "hand stamp" by the U.S Post Office, for sure!

This is a scan of the back of the card, signed by the artist, (Me!) and the back of the envelope, too.

Lots of pretty pink and orange and green to go around. And, the inside is just as pretty, too.

I am going to enter this in the color challenge at - http://colourcreatechallenge.blogspot.com/

I sure do hope they like it as much as I do.
Now, I wonder who I will send this beauty to. Hopefully it will brighten up their day as much as it has mine.

Don't you just love it when art makes you smile?

p.s. Does anybody know how to make photos pop up on a separate page to show the art close up? I couldn't find instructions on blogger.

Saturday, August 08, 2009

More Handmade Cards

Card front -
I'm using 140 lb. watercolor card sets to practice all kinds of techniques and materials. The front of this card has a layer of gesso that I made marks in before it dried, making the card rather heavy to hold. I then sprayed watercolors and after that blend of yellow, orange and red dried, I used oil pastels to draw the hearts.


This is the front of the envelope. I got carried away with smudging the crayons, but it sure was fun to do.

I used the same techniques for the inside of the card leaving room to do some writing when I send the card to someone, someday.

This is really fun!

Saturday, August 01, 2009

A handmade card.

The front of a new handmade card.

Sometimes it's fun to just forget how much you are trying to learn a new skill (drawing portraits) and just play around with color again.

I had some watercolor card sets sitting around in my garage/studio that were so old the paper was getting a yellow tinge.

That happens to me a lot. I buy supplies and then put them up on a shelf because I don't know what to do with them. Yet.

I rediscovered a bunch of liquid watercolor bottles I had gotten from Crayola and decided to put some in spray bottles and play around with them for awhile. What fun it is to spray color all over paper!!!

I had a lot of background papers made just for practice and started to cut them up and use them as stencils to spray over and through. It's really fun to use the negative paper you get from cutting out simple shapes.

After using lime watercolor sprayed and dripped on the card, I added some blue acrylic paint. A quick swath of color was just enough, but I made sure to do the envelope and inside of the card all at the same time. The more drips and splashes, the better. I need to do this kind of stuff to loosen up! I am so new at making paint related art, I tend to over think every decision.


This is the envelope. I used the negative shape for the address box and really looked forward to writing a real address inside it.

I even uncovered the sewing machine that has been sitting on my table in the garage and sewed a metallic gold thread border on the heart papers.

For someone who has sewed on fabric for 50 years or so, this was a happy, happy work.


This is the inside of the card, opened out so you can see the stitches made by the sewing machine. I was amazed at how easily the thread laid on the paper. Not one episode of thread breakage or shredding. Amazing!! This stuff is usually so picky and even using a large eyed needle and all the silicone lubricant I can slid over the spool, there is usually a time or two of threads shredding and such.

This watercolor paper was a dream to work on. I am going to make lots and lot of cards. What a wonderful way to practice collage techniques and come out with something useful, too!

This card is going to Karen. Happy Birthday!!!