Sunday, October 15, 2006

Painting The Waiting Room - part 4


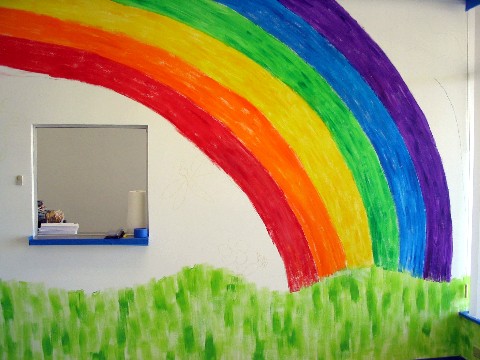
The rainbow wall. It came out great, even if the colors are upside down.


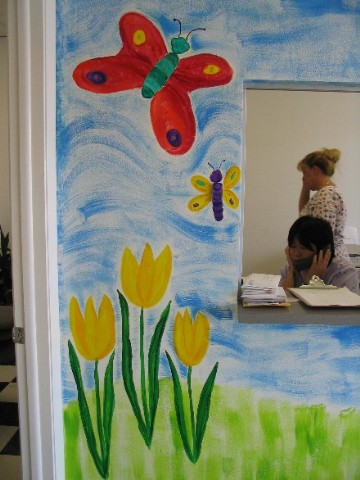
Every garden needs a dragonfly, and lady bug on a big red flower.


The dragonfly and tulips look oh so childlike and you can see Eva our receptionist and Penney, our nurse in the window where patients sign in. If you look carefully you can see a butterfly painted over a door bell. Kids like to push on it and because of all the paint on it, it rings and rings and rings and then we get a good belly laugh - especially from 2 year olds!

Sunday, October 08, 2006

Painting The Waiting Room - part 3


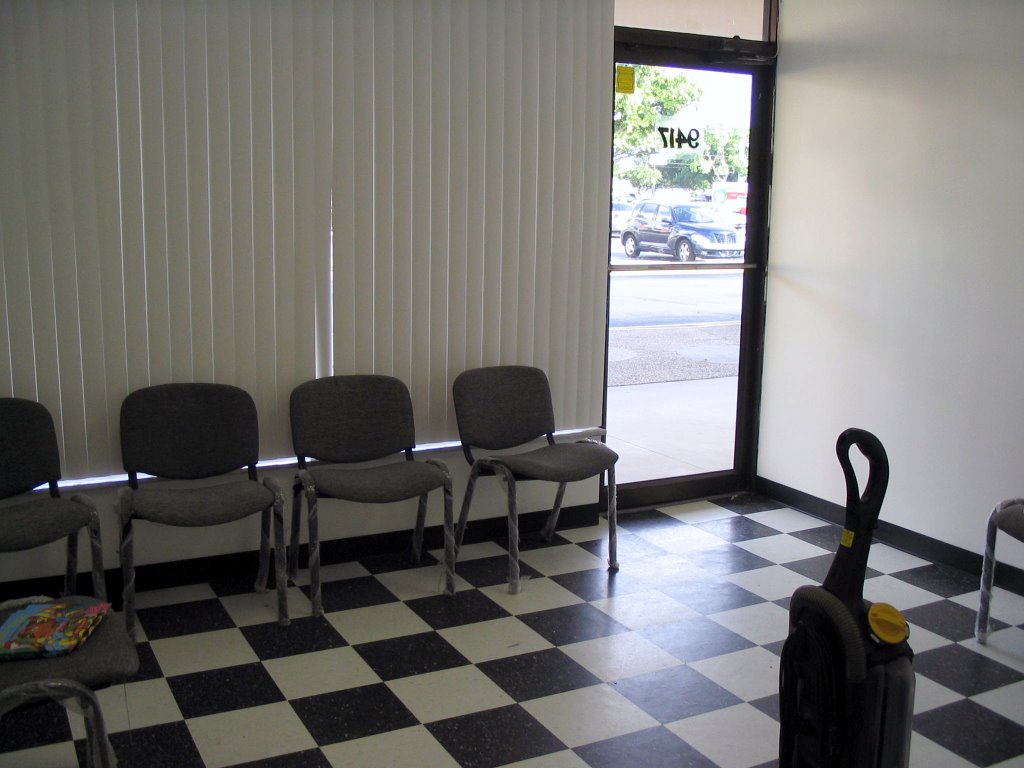
This is the right hand side of the waiting room with the receptionist opening in the wall. I removed the partition, so anyone coming in can feel they will be noticed right away.


It was fun drawing the arc for the rainbow. And coloring it in with many shade of each color was the best part of the project for me. A few weeks later, someone told me that I had the colors upside down.

Seems to me I did a good job of being an 8 year old artist, just like I wanted.


Painting big goofy flowers is something I've always wanted to do, but never had a legal place to do it. Now, with the rent we pay, I don't have any problem at all making marks on any and all walls that we see everyday.

Saturday, October 07, 2006

Painting The Waiting Room - part 2


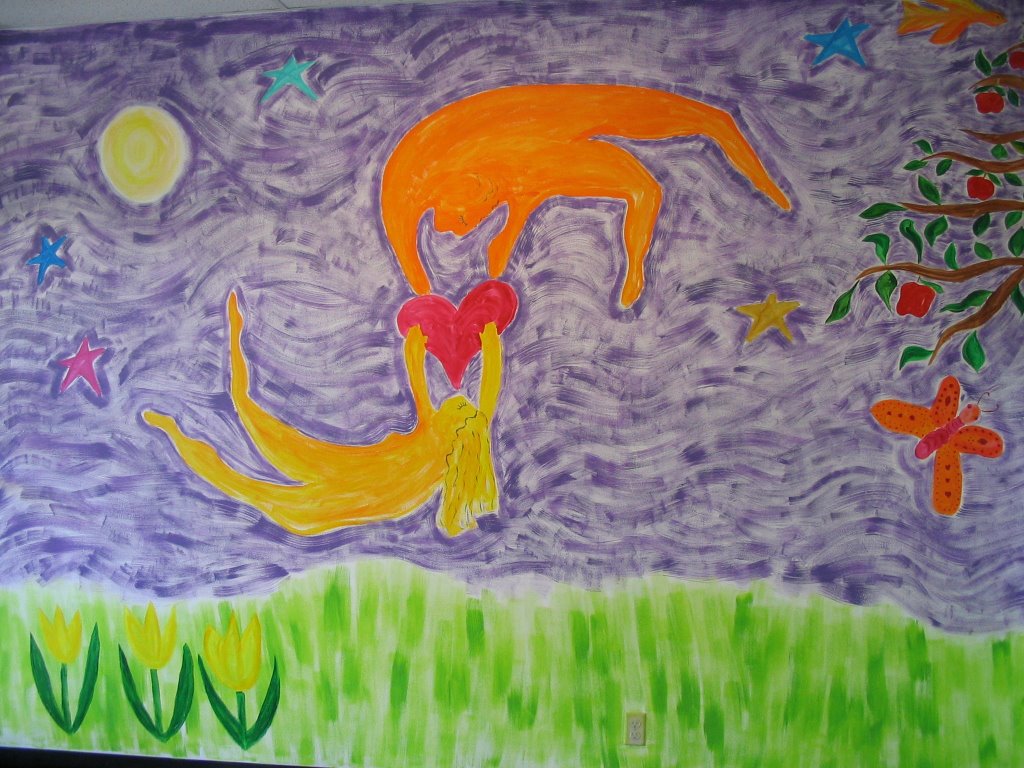
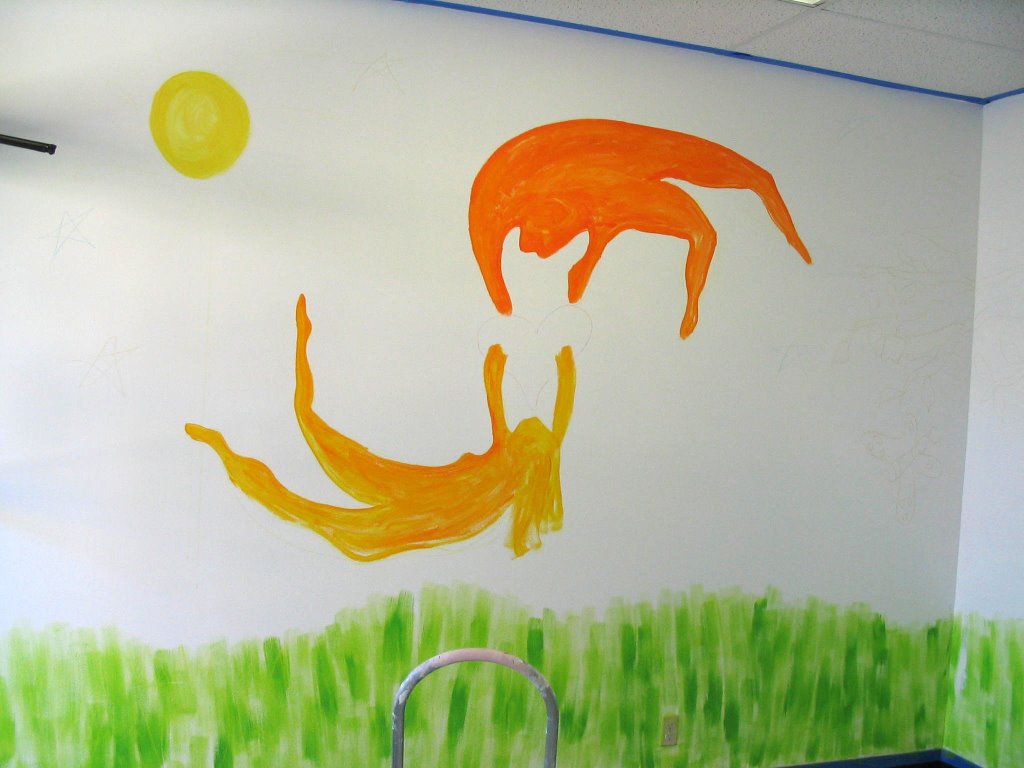
Adam and Eve are forever entwined around the force that started it all. Love. At least that's what I believe. Eden wasn't a trap, it was and is such an incredible place of beauty that it's no wonder Eve just had to find out about it. Curiosity is what leads us out of that which is known and into the unknown. Ask any artist.


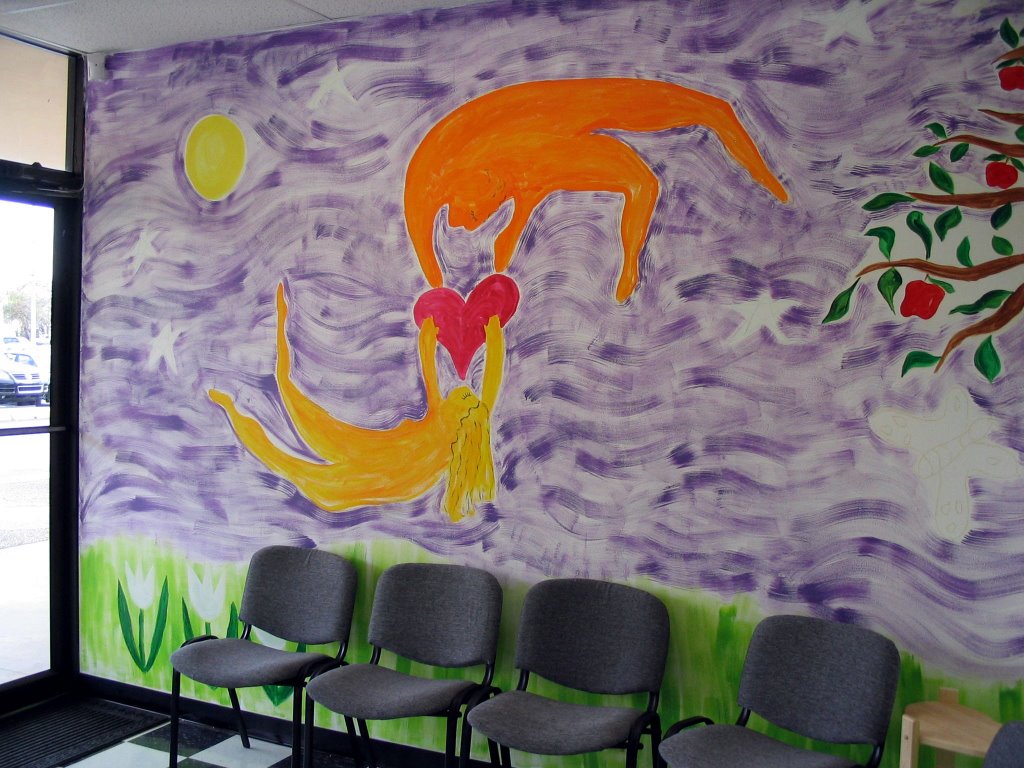
My desire for these walls was to paint them in such a way that it would look like a child had used crayons on the bumpy paper teachers give you at school. I found a way to work with cheap "chip" brushes using very little paint to get the effect. In fact, I absolutely had to hold myself back at times, because my grown up me wanted to perfect the images too much. Sometimes it's very hard to go back to the 8 year old mind and body.


Now you can see why I only painted three flowers by the door. All those chairs! I was still working on this and patients had to have somewhere to sit. Sheesh!

The color of the sky is purple indicating night and the unknown, the unseen, the moon making light that helps us to see, but we're not alway sure of the way because so much is still hidden. Like curiosity. It urges forward movement, but makes no promises about the outcome.

Don't you think G-d is surprised everyday?

Thursday, September 28, 2006

Painting The Waiting Room -part 1


I am now beginning the saga of how I painted the waiting room of our new office. This all started in October of 2005.


Every Sunday I would drag my paints into the waiting room, clear out all the chairs and look at the bare walls, hoping for inspiration.

It got pretty messy in there at times. I didn't have a premade plan. Just the desire for color and something, well, not usually done.


Since we were beginning a whole new way of life, the Creation theme got a hold of me and I have been leaning on it ever since. Here is the birth of Adam and Eve.

Wednesday, September 27, 2006

Peridot Swarovski Set


It seems as if I need a lot of time to recover from my painting projects. It's been at least two weeks and I haven't had even one small impulse to go near a paint can.

Instead, I have been reading, watching old movies on Turner Classic Movie channel and cleaning my sewing room on the weekends.

The nice thing about cleaning out old stuff is that you rediscover stuff started that just needs a little tweaking to finish it off. I now have several bags of that kind of stuff.

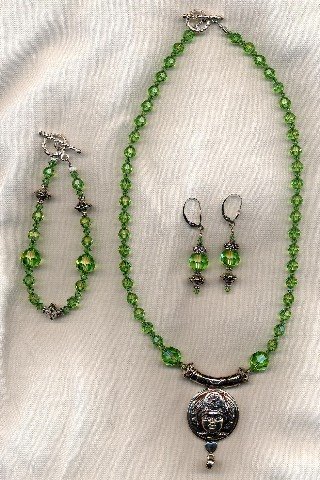
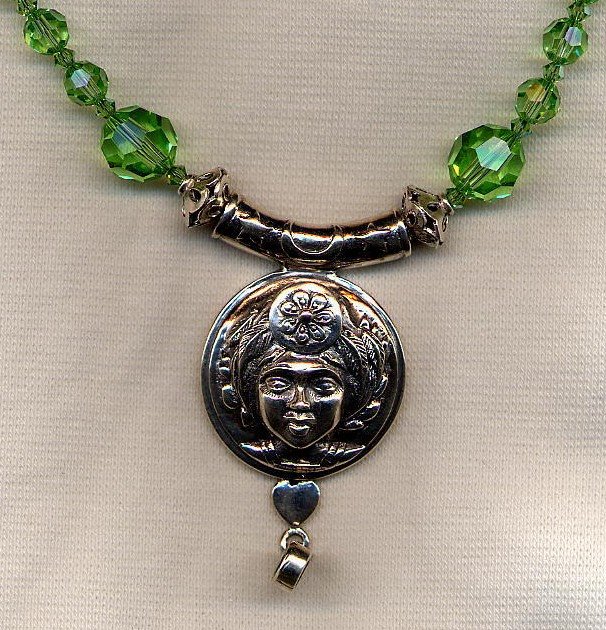
This Swarovski crystal set was one of them. I had been wearing this sterling silver and peridot goddess pendent on a sterling silver chain, but it just didn't "pop". It mostly sat in my drawer looking pretty.


Now, with all the perfect shade of green crystals with an aurora borealis finish surrounding it, I wear it as often as possible. And the earrings and bracelet make me feel so fine!

Wednesday, September 13, 2006

Hand Painted Table & Chairs - at last!


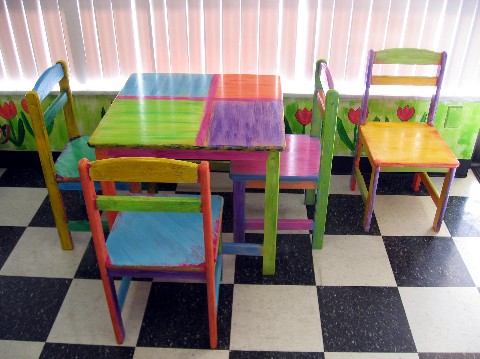
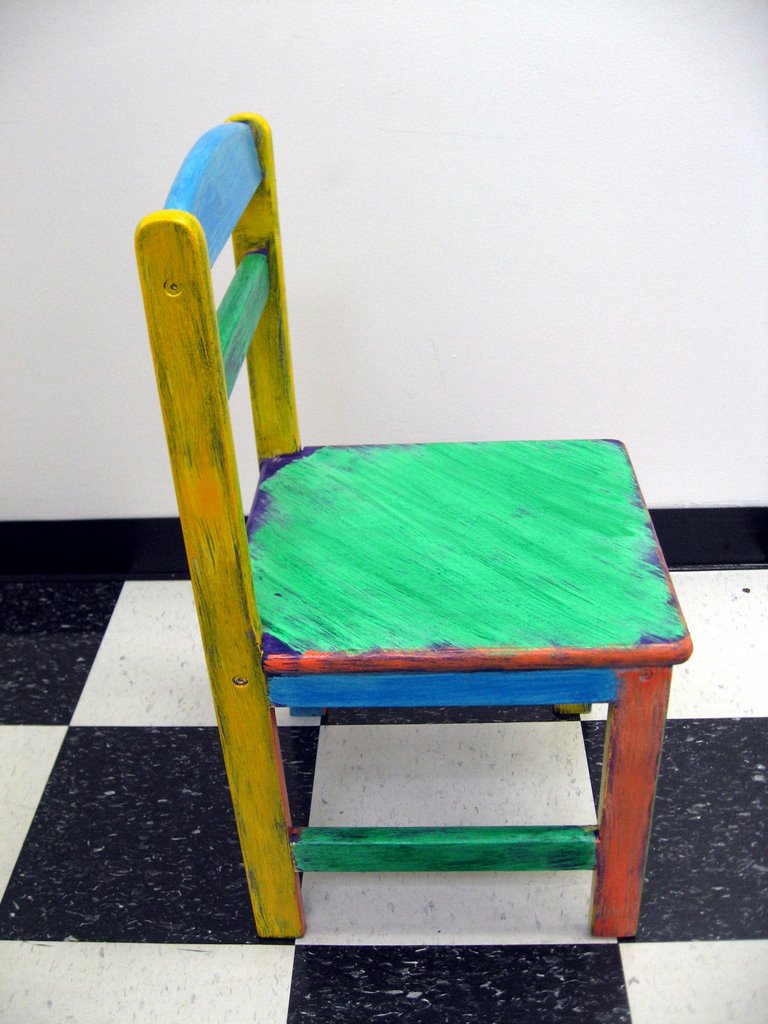
Here they are in all their glory. A table and chairs bright enough to glow in a brightly lit waiting room.

I took this photo in the early morning when the sun was rising in the east and keeping everything way too bright. You can see that even the verticles aren't able to shut out that intense light.


My, oh, my, how the high gloss enamel reflects every ray that arrives!


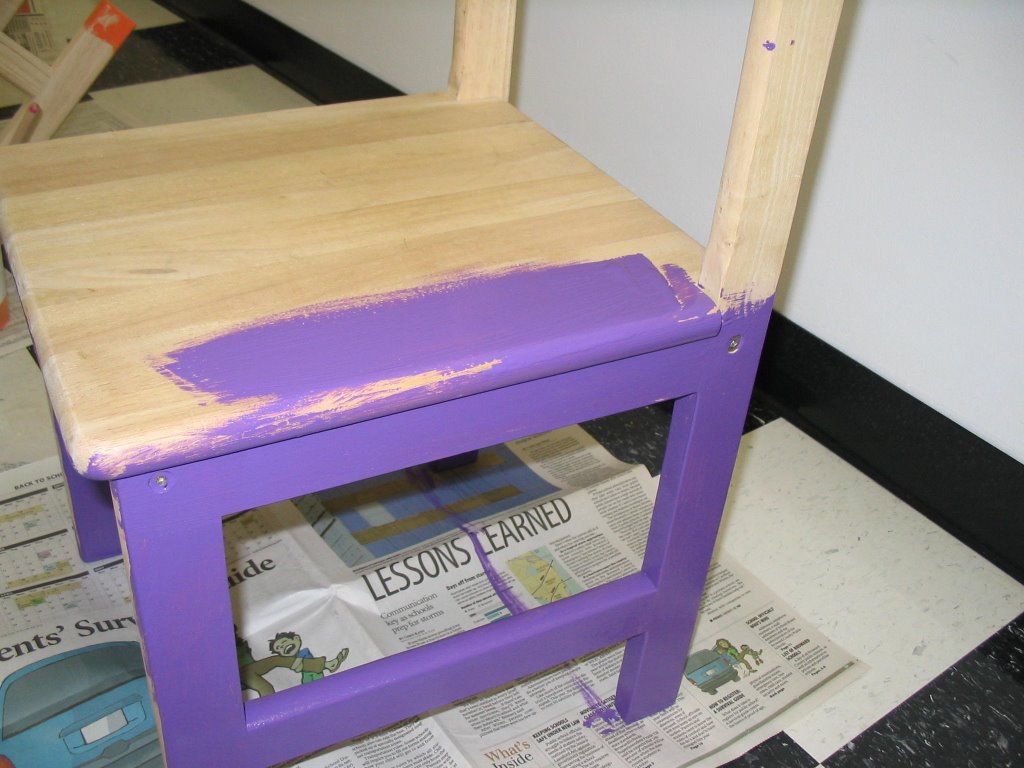
This is how they sat in the coffee room waiting for me to make up my mind about what I was really going to do to them.

I watched them for about two weeks until I just couldn't stand it anymore. Sure they were OK. But not OK enough to stay that way forever.


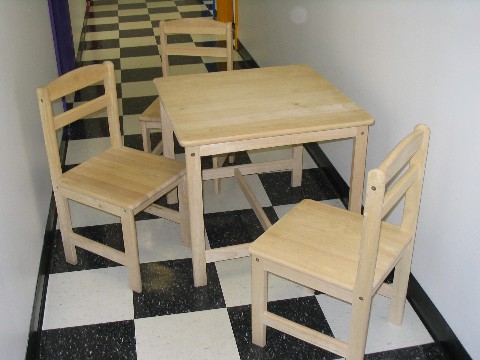
And, of course, this is how they were when they were first born.
Pretty wood. Nicely shaped. Solid looking.

Good enough to use as they were for about 10 whole months.

Like a blank canvas for an artist,
sometimes one has to be blank while the inner workings build up enough strength to be born.

Sunday, September 10, 2006

Handpainted Rose Chair - the last one!


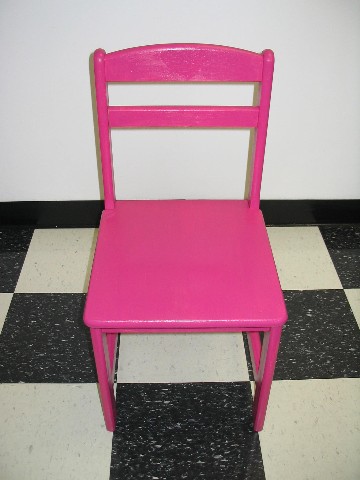
Remember this? It was the first one I talked about. A very nice color. My front door is almost this color.


But this is the shade that I love the best. A deepened rose color that I never, ever tire of. The entire back wall of our bedroom is similar to this, only I did a color wash that makes the wall look like suede from a distance. And, I made a king size quilt based on it. I think I even posted some photos of it awhile ago. I'll have to check.


The final product.

I had more trouble choosing colors for this chair than I did for any of the others. I think because I just like it so much as it was. The deep shade of rose is my favorite color to be around in our house. However, it had to change to this to be part of the group, so it let me paint it over and over until it finally said, "enough".


I especially like the brush strokes on the seat of the chair.

They go sideways!

Stuff like that just comes up as you paint.

You just never know how it's going to turn out.

Saturday, September 09, 2006

Turquoise Hand Painted Chair


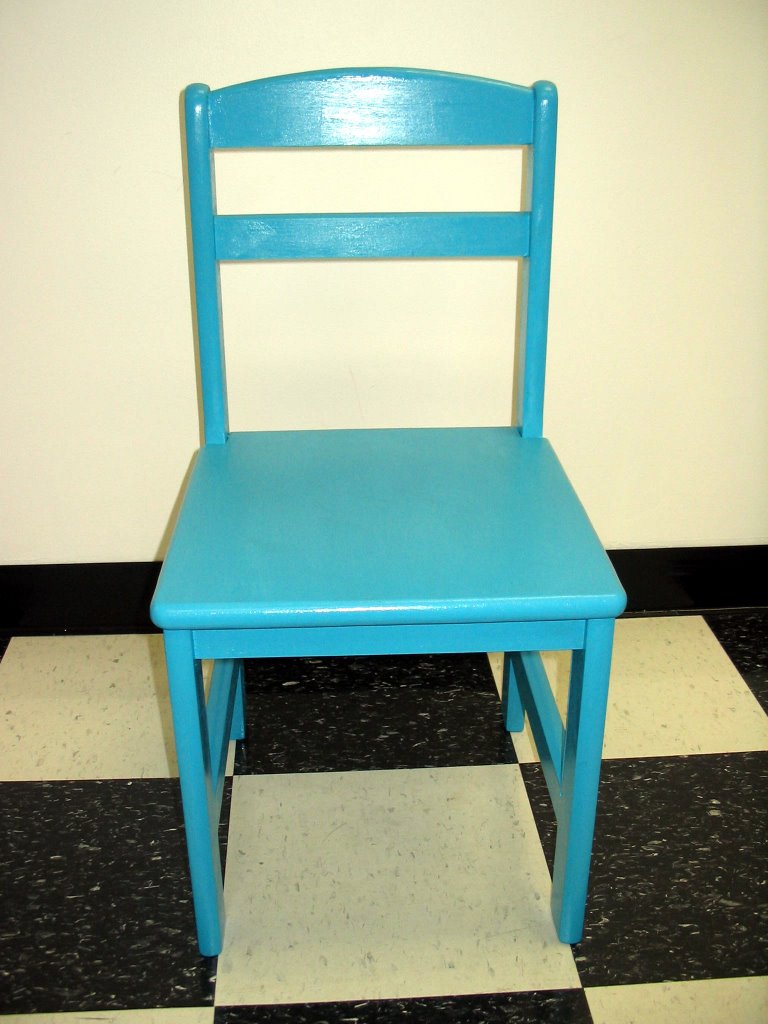
I just adore this color. I have made quite a few pieces of jewelry with turquoise stones. It is so much like our South Florida sky. But, once again, as I looked at it for about a week, I just couldn't leave it be.


Aren't these colors great with the turquoise base underneath? I especially like the dry brush effect. It looks a little rugged, and not only allows some color to show through, it is a great technique to use on childrens furniture because you know it's going to get banged up.


I use a really scruffy "chip" brush and mix two or three colors on the brush when I paint. I start out with a deep color, mix a little white on the side and then use some acrylic paint from a tube for an even darker slice of color.

Since it's all water base paint, it is very forgiving and seems to go on nicely. When it dries there is still mostly the high gloss of the white and main color, so it is a shiny finish - mostly.

I thought about applying a polyurethane top coat for protection, but wasn't so sure it would protect the paint enough. I've used it on other projects and still find paint chipping off with use.

Oh well. Use is a form of flattery.

Friday, September 08, 2006

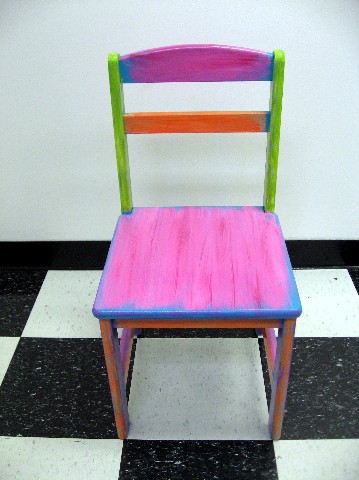
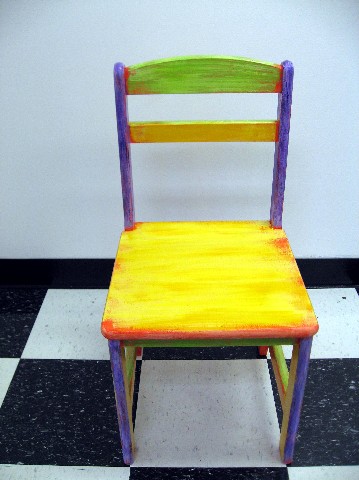
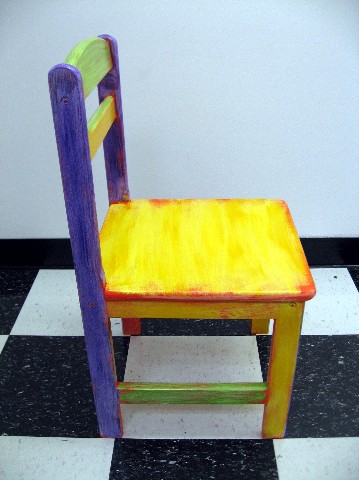
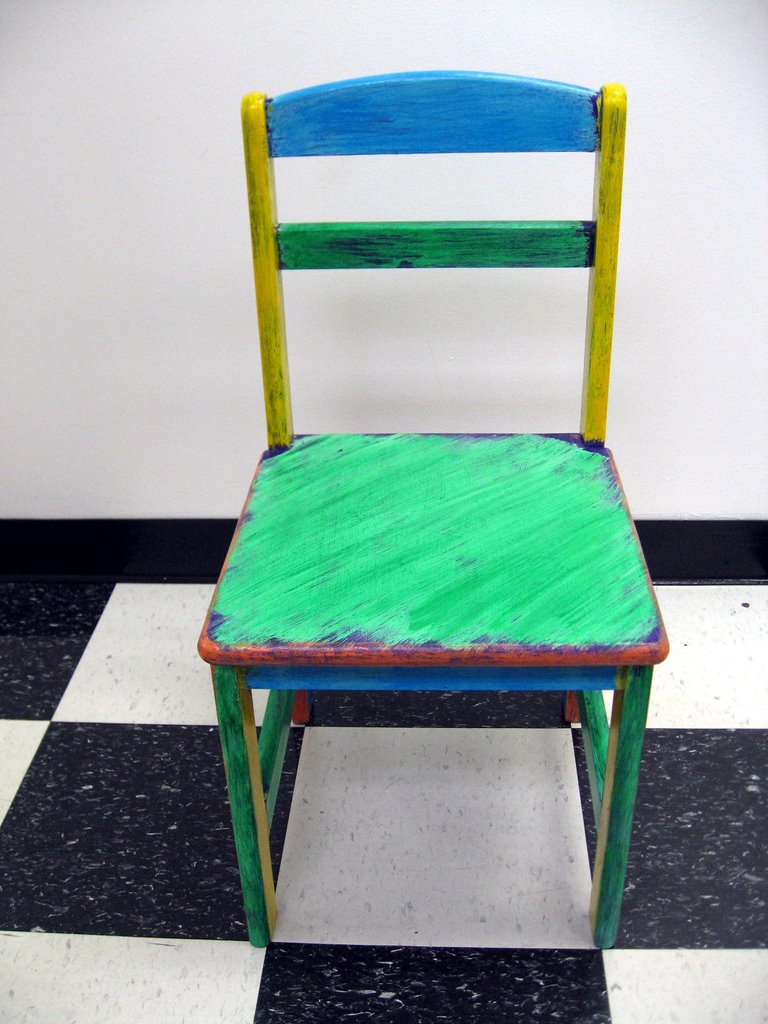
Hand Painted Orange Chair


This chair started out orange and then became something else.


And if you look closely, you can see little splotches of the orange still trying to peak through. It was a lot of fun figuring out what colors to use to add character to this little chair.


Here it is in the darkened orange stage. It was nice. It looked good with the other chairs in their solid color life, but as with all things that live, evolution must go on.
Stasis is safe, but not very interesting.


This is the baby orange chair with its' first blush of high gloss enamel. It's a very nice orange color. Not too red, not too yellow. Just right. Except it was born into my house and as such is destined to change along with everything else. I mean is anything ever truly done?

Thursday, September 07, 2006

Hand Painted Purple Chair


And here it is. Kind of hard to believe isn't it? Underneath all that color is the darkened purple base. I just couldn't leave it alone.

So, now it's got green, turquoise, orange and yellow enamel first lightened with white and then dry brushed with the darker shade.

This chair just dances with color!


And there really isn't anything wrong with this at this stage, is there? The purple enamel with a darker purple dry brushed over it give it depth and sure is interesting to the eye, but as much as I like it, it told me it just wasn't done.

Sometimes the inner artist sure has a LOUD VOICE.


Our humble beginning. Oh how far we had to go and I didn't even know it. I hope this chair is happy now, because I am taking it into the office with all of its' siblings and that is the end of it's current fix up state of mind.


Now it is at the office and is waiting to be used by lots of little kids with sticky fingers, who will sit on it, stand on it and knock it over on a regular basis.


sigh.

Saturday, September 02, 2006

White Wool Ease - Fun Fetti Hat and Scarf


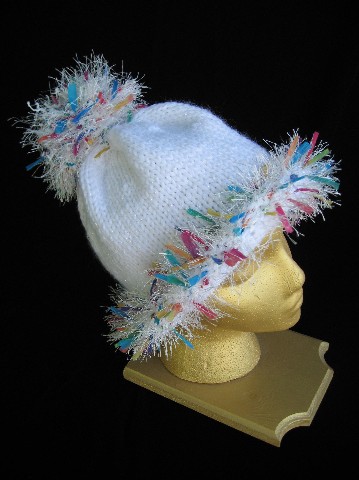
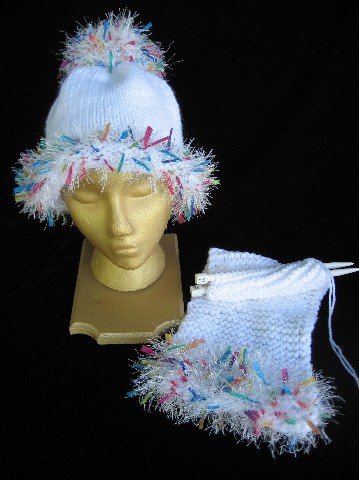
It's finished! And, I just adore it. It was fun to knit, even using those awkward circular knitting needles. Once it's all on and the yarn is not twisted, it's fun to just be able to knit, knit, knit.


You can see the first Pom Pom I've ever made here in this side view. Cute! Fluffy! A nice balance to the rolled brim!


And now I am making a scarf to go with it. I'm using double strands again, but this time I'm using a pair of short, size 13, straight needles and just knitting every row making a loose, bumpy pattern that with be stretchy and comfy to wear. Both ends will have the Fun Fetti and I plan to make it very long so it can be wound around my neck more than once, or when I wear my long black wool coat the ends will be long too.

It's a shame you can't see the sparkles of the silver that is in this yarn. It makes the hat look like new fallen snow that is sparkling in the sun. I really, really like it. I just bought some more last week, 'cause now that I'm feeling better about those circulars, I can make gifts using it.

Sunday, August 27, 2006

Knitting on Circular Needles


I finally did it. I finally got up the courage to try to knit something on circular needles. I haven't tried to knit anything over the past several months, but I have been collecting things knitting related. Books. I just love to look over the possibilites of what a person can do with their hands.

As with any other craft I have tried, I collect all kinds of books on the subject and immerse myself in them, sometimes for months and months at a time before I try even one technique. I guess I learn by reading and then imagine myself doing the technique, eventually just getting the urge to try it out.

I couldn't find 16 inch circular needles in any of the craft shops around here, so I went on the Internet, Googled, "circular needles" and actually bought sizes I thought I could tolerate - nothing smaller than a size 8 for me - with matching double pointed needles, too.

These have sat in a box on my desk for about 3 months. Sigh.

Yesterday, I got a book by Lion Brand Yarns, "Just Hats" and read the one thing I needed to get me going.

Make a swatch. That's my swatch up there. I wrote down how I made it and what I made it with and attached the 3 1/2 x 5 card to it with a pin. Preserved for eternity.

OK, OK every yarn book on the planet says make a swatch before making a knitted article, the exception being scarves I guess, as most scarves will definitely fit most bodies.

Most of the time, I just didn't get started on a project because I didn't have the same yarn used in the pattern and, this put me off so much, I just let all the patterns I've collected off the Internet and from my books just sit and stare at me. I was afraid.


HOWEVER, this little book gives you the pattern based on your swatch. Not the other way around. I don't have to try to find a way to match the gauge the pattern calls for. I don't have to knit 4 or 5 or more swatches hoping to match the designer's gauge.


This backwards thinking in "Just Hats" sent me forward. I made a swatch using yarn I have, the size 11 circular needles I wanted to use and then measured how many stitches per inch I was making.

3.5. Or, about 14 stitches for a 4 inch swatch. I then calculated for a 20 inch head size because the swatch felt kind of stretchy to me and I figured that with my 22 inch head, it'll probably be OK. If not, I'll give it to my petite sister. Or I'll donate it. Or, I'll hang it on the wall as "art".

Anyway, I stayed up late last night getting the first three rows cast on and knit. All the books say, "be careful not to let the first row twist". Another thing that put me off circular needles. I have a hard enough time just casting on and now I have to worry about watching how the stitches line up on this impossibly small hoop in my hands! Oh, the worry for a Type A, first born, perfectionist type!

I got through this first three rows by following a suggestion made by Stephanie Pearl-McPhee, aka, The Yarn Harlot. She said to knit the first row and second row as if you are using straight needles. Go back and forth. Then, on the third row, join the stitches. By then there is enough yarn knitted to keep the stitches straightened out.

I did it. And it worked. Thank you Stepahnie!

Today, after catching up on insurance EOB's (explanation of benefits) for the office, I gathered myself in my favorite chair and knit, knit, knit!


Doesn't it look good? This is actually the inside of the hat, but you can see how I am really using circular needles, for sure.

And, it's rolling nicely, 'cause that's what I want:
A Roll Brim hat, with no back seam. Don't you think the "Fun Fetti" is a nice touch? The white wool has little streams of silver running throughout, and I just love the way it looks.

The Yarn Harlot also said in "Knitting Rules!" that an easy way to measure the length to knit is to measure from the base of the hand to the tip of the middle finger of the person the hat is being made for. Then do the decreases for the crown.


So, letting the roll roll, I'll have to knit 7 inches more and then I will almost have a hat.

I hope this works!

Saturday, August 26, 2006

Swarovski Crystal Earrings - I made myself!


Aren't these beautiful? Last Spring I was getting itchy to learn a new craft and decided it was high time I learned how to wrap wire so I could make more interesting jewelry designs.

These are 12mm Swarovski Crystal. The color is Aqua AB, meaning the pale blue has an aurora borealis finish on them which makes them sparkle with rainbow colors.
Beautiful!

The caps and other findings are Sterling Silver, including the wire they hang on. The earring clips are lever back wires which make losing them much less likely. I wear these alot and since I'm on the phone at work so much of the time, I don't have to worry about them falling off and getting lost. Good!

I've been practicing making more because I just think these are so pretty and have finally gotten confident enough to make some as gifts.
OK, OK , if you look closely, the spirals of wire are not exactly perfect, but if you are standing that close to me to see that, then, sir or madame, you are too darn close!

There's a reason personal space is personal space - and this is one of them!

Monday, August 21, 2006

Sunday's I Paint


Sunday's are a good day to go to the office to paint. After a whole day of rest on Saturday, I'm looking forward to doing something tangible and creative. With no phones ringing or a computer demanding my eyes, I can take out my pots of paint and have at something that is naked and dress it up with color, someway, somehow. This group of kiddy size table and chairs have been in the waiting room for 10 months now, getting grubbier and grubbier with each kiddy visitor. That's a nice kind of natural aging process, but I'm just not into it. I like COLOR!


I like to start at the bottom. Using high gloss water base enamel will make everything shiny and easy to clean.


This is a base coat of a gorgeous rose color. But, it is a little "flat".


So, I took my most favorite ratty chip brush and dry brushed some magenta all over it. Now it looks interesting.

I managed to get four chairs and the table base coated in 6 hours, at which point I had to stop because I started dropping things. A sure clue to stop, clean up and go home.

This is the beginning. I plan to add more color to each chair so there will be a veritable rainbow and hopefully, a funky playful place to sit and play. But that's gonna be for another Sunday I paint.

Sunday, August 20, 2006

A Long Year

I absolutely cannot believe that more than a year has passed since I wrote one word in this little blog! Guess because so much has happened to change the pattern of my days, it's really no wonder.

What happened?

Well, I started working outside my house, that's what happened. Not too far outside, but outside it is. It all started when my husband told his partners he was planning to retire in two years...
Not an unexpected event, really. He thought that when he turned 62, it would be a good idea to take up other interests. Put more time into his golf game. Work out more often. Travel to Denver to see the grandchildren. You know. Just ordinary stuff.

However, it turns out that his first partner didn't agree, suddenly, on the terms of the contract that had been in place for over 20 years.

Man oh man, what a mess! Lawyers, letters, disputes, and a lot of really childish behavior(his). This man figured since he was going to be left with the practice, he could arbitraily decide what he wanted to do with it. And, if my husband, who started the whole thing in 1979, was leaving, then he could keep all the money. (And not share any with my husband, ever)

Amazing what a lack of morals allows people to do. It didn't help that we had a contract that was "loosely translatable" either.

So, what to do? It took a year, but in the end, we decided to start our own practice - again. I had helped him set the first one up back in 1979. I am an R. N. and a Pediatric Nurse Practitioner, so I was his nurse, his receptionist, his bookkeeper as well as wife and mom of our two young sons. Very young.

I really didn't want to work at that time. My kids needed me and I wanted to be with them. I had never planned on having them and then handing them over to someone else to raise. Yeah, yeah, yeah, I know that's really old fashioned and probably not even politically correct anymore, but even in the face of the pressure put on by the women's movement, I still felt my place was home, home, home with my kids.

After a couple of years of frantic working schedules, I did finally quit when the practice was able to support a nurse, a receptionist and us too.

Being a home suited me. Suited us. Everybody knew I was there for them. For my husband, I was his center. For my children, I was their touchstone. And, I was there to carpool, cook, shop, get the laundry done, organize family parties and take care of our pets, the garden, cheap chic decorating the house and do volunteer work at the synagogue.

As the kids grew up, I had lots of time to do other things too. I started a small business and made beautiful prayer shawls for women. A chance to develop my sewing, machine embroidery, dyeing, fabric painting, silk ribbon embroidery and beading skills. So much fun to do! Soon, I made shawls for men and boys too. I got so busy I had to hire help. It was great. Then it got so busy it got to be unfun. I was running ragged around the edges and slowly pulled back.

I was kind of in a coasting mode and soon the grandchildren began to appear. New fun! New things to do! A different phase of life. Wonderful, wonderful, wonderful.

And then this. Now I am back to work full time. I have set up a new office for my husband.
And, let me tell you, it ain't like it used to be.

Everything is computerized and electronic. The charts, the billing, and really fancy phones!

And, everything is dependent on the medical insurance industry. They have complete control over every aspect of running a medical practice. If they decide to take you on as a provider of medical services, you have to run everything according to their rules. They tell you what has to be hung on your walls and what has to be in the charts. And they tell you what they will pay for and what they will not. And, how much.

It's a problem just getting them to give us enough money to cover the cost of the vaccines we have to give to our little patients. And some drugs they don't even cover! If my husband feels that a child needs a certain vaccine and that patient's insurance company doesn't cover it, we have to pay for it. And, according to some of these contracts, we are NOT ALLOWED TO BILL FOR IT. We take a hit because we want to do the right thing.

If you want patients to see you, you have to have insurance plans that they use. A pediatrician is considered a "primary care physician". A gate keeper. Ugghh! That means for most insurance that most people can afford, they have to have PERMISSION from their primary doctor to see any specialist they may wish to consult.

I am beginning to hate the word: Referral.

As office manager, I have to write all the referrals. It wouldn't be so bad if all they needed was a signed prescription, but it aint' so easy as that. Sometimes it takes as long as 45 minutes or two days to get permission from the insurance company for the patient to see a specialist.

It's really sickening.

Anyway, as this post is getting too long, I'm gonna have to stop. But, since I feel as if my head is just bobbing to the surface of a routine these days, I will make an effort to show some of what I am doing again. I am painting the walls and doors of the office, making it colorful and fun for the kids who have to face big scary needles and other unexpected insults to their beautiful young selves.

Note to self (and to anybody out their who has a business of their own) :

NEVER MAKE ANYONE AN EQUAL PARTNER.

Friday, August 12, 2005

Silk Painted Poncho - my first!

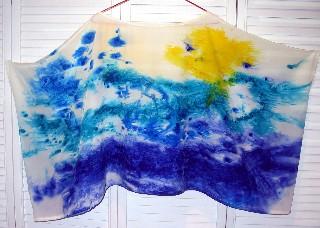
Making a hand painted silk crepe poncho inspired by the art glass necklace I made last week, was the most fun I've had doing something new to me in a long time!

I bought some Seta Color transparent fabric paints from Dharma Trading Company
http://www.dharmatrading.com/sunpainting/ a couple of years ago, but never had the courage to try anything with it. Thanks to the soft urgings of Susan Sorrell, my muse, http://creativechick.blog-city.com/ I decided to use up the, by now, thickened and almost too old paint. If it didn't work out, I really had nothing to lose but a few hours of time outside in the South Florida sun.
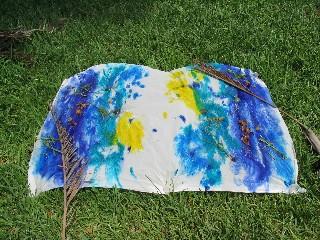
After washing the crepe silk http://www.thaisilks.com/ in the washing machine, in warm water, to shrink it and prepare it to more easily accept the paint, I spread the two yards of wet fabric out on the grass in my front yard. I used three shades of blue and some golden yellow fabric paints. All had to be diluted with water because they were so dried out, thickened to the consistancy of tomato paste.

As soon as I had the fabric weighted down, I started to drip and drizzle and smear the paint with my hands.

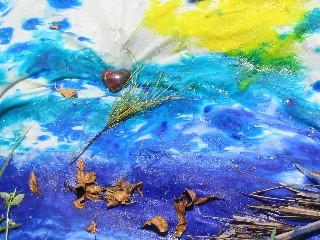
After that I threw kosher salt at it. Kosher salt is great because it comes as big, fat chunks of salt which causes the dye or paint molecules to gravitate toward it. This makes a very interesting pattern as the paint dries. I also tossed on some dried leaves, heart shaped rock crystals, and dried palm branches.

The grass was rather long and made the surface of the fabric roll unevenly. The salt collected in patches and the paints migrated according to the hills and valleys of this uneven surface.

It was great!

Never before have I allowed myself such freedom in creating! I have used a lot of silk dyes for the prayer shawls that I have made in the past 12 years, but the fabric always had to be stretched out tightly on large frames. Then steamed for three hours to set the dye and then there was a trip to the dry cleaners to remove the gutta resist. I never liked the water soluble resists as I just couldn't get them completely washed out of the fabric. And, unfortunately, I found that within a couple of years, the colors would begin to fade if I had hung a finished piece, like a marriage canopy, on a wall in my sun drenched south Florida home. It was dissatisfying, to say the least! I guess, I didn't use the fabric paints because I was afraid the results would be less intense and just as much work.

Boy was I wrong! And, boy am I glad.

The paint and fabric was dry within two hours. The sun was shining brightly maybe half the time, making the possibility of a clear sunprint of the solid objects laid on the paint, dim. Plus, the paint, as I have said too many times before, was old. But the results, to my eyes, were spectacular!

It was with much excitement that I picked up that piece of silk and took it to my ironing board to set the paint with the iron high on the "cotton" setting. I ironed both sides of that silk. And, I didn't let the fact that the fabric was now as stiff as a paperback cover bother me. I was going for the gold! That paint was gonna set, come heck or high water!

Immediately after ironing it, I dunked it in a pail of water and rinsed and rinsed. Now this is the part that usually brings tears of frustration to my eyes when working with silk dye. I have found that it is IMPOSSIBLE to rinse steamed and dyed silk and not have at least some back staining on the fields of white. There are always free dye molecules just looking to attach to something!

Ah, but this paint stuff. It's amazing. Sure there were extra layers of paint that did not attach to the fabric. But, you know what? They just floated in small clumps and rinsed right down the drain. Not ONE small particle decided to set up housekeeping on my white silk. Zowey!

Later that evening, I cut out the pattern and sewed it together, doing nice folded seams and all that jazz. It was a pleasure! The hand of the silk was smooth and soft and as silky as if it had never been abused at all. And, the colors did not wash out or get pale in the rinse bucket. The cobalt was as rich as the necklace that started it all.

Next day I wore it to lunch with a friend and followed that up with three hours of errands. Mucho compliments came my way - all spontaneous, of course!

It's good to be happy.

Sunday, August 07, 2005

Bereshit Tallit - machine embroidery & silk painting


Bereshit Tallit Posted by Picasa

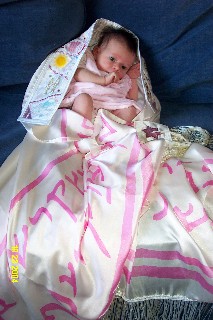
This is a photo of my granddaughter wrapped in the tallit (prayer shawl) I made for her naming day ceremony. I have been making tallitot (plural of prayer shawl, in Hebrew) since 1993 and I guess it's about time I talked a little about this work.

This particular prayer shawl measures 44 inches wide and is 72 inches in length, not counting the 12 inch decorative rayon fringe that is sewn on to either end. The fabric is silk charmeuse and I dyed it, using Dupont french silk dyes. The letters that you see are the Hebrew alefbet (alphabet) done in the most ancient form of that script, found in the Dead Sea Scrolls. The letters seem simple, but they were created using the quills from bird feathers, so the form follows the function of the writing tool.

I found this calligraphy in a wonderful book, "The Hebrew Letter - Calligraphic Variations" by Ismar David. I enlarged the letters to three inches in size and used gutta resist to outline each letter before applying the silk dye. I find this process to be quite nerve racking! If there is one break in the gutta, dye spreads all over the place and the piece is ruined. I, quite literally, find myself holding my breath while applying the gutta around each letter, and again later, when filling in each letter with silk dye.

The dye dries very quickly, but I have found that it is a good idea to let the dye cure for a week or so before I steam it. It seems to give me a more permanent coloring and fewer dye molecules drift around to backstain the silk when I get to the rinsing process. Rinsing comes after 3 hours of steaming in a verticle tube. The fabric is wrapped in cloth and newsprint and rolled around a 50 inch long plastic tube which hovers over a vat of steaming water enclosed by a metal housing. This sets the dye. This is a lot of work.

Next, I take the fabric to the dry cleaners, ask them to put it in a special bag when they submerge it in the solvent, and the gutta resist is removed, leaving a very smooth and beautifully designed piece of fabric. This makes me very happy.

While the fabric is going through all of this, I can work on making the atarah. The atarah is the neckpiece of the tallit. Its' only purpose is to tell the wearer which end is the top. It is, therefore, "the crown" of the garment.


If you look carefully at the embroidery, you will see that it is based on the first lines of the first story of the Bible. Bereshit means "In The Beginning" in Hebrew. Therefore, the figures are of Adam and Eve, the sun, moon and stars, fish, animals, flowers and the Tree of Life as well as the symbol of temptation, the snake.

Each figure is embroidered in a separate hooping on my Janome 9000 embroidery machine. I have first drawn each picture, scanned it in the special scanner which turns it into stitch data, and saved it to my PC. After that, I can save it to a special memory disc which fits into the sewing machine, and will then embroider the image in whatever color thread I choose to use. This is an amazing process and I am in awe when it all works right!

As with any multi-step process, there is a lot of room for errors in any part of the dance. sigh. The fabric has to be hooped correctly, in the exact spot that you want for the embroidery. The whole thing must have adequate stabilization to prevent the fabric from pulling in while the needle pierces it hundreds of times at a rate of 600 stitches per minute. The tension in the bobbin and the top of the machine have to match. And, the needle must have a large eye so the thread won't shred, knot or break. All of which happens with enough frequency to make me want to SCREAM some days.

Some days my machine just wants to flake off. Tune out. Spit up. Freeze. These are the days when I just have to let it have its' tantrum and I let it alone. I do something else and pretend I am not bothered. (but I am!)

Anyway, at some point it all comes together and I can hem the dyed silk, sew on the embroidered, beaded and satin bound atarah and finish by afixing embellished corners to the tallit.

A tallit is a prayer shawl. It is just what it says. It is a garment worn for prayer. In Synagogues and observant Jewish homes around the world, it is worn every morning for the full participation of communion with G-d. Each corner of the tallit is adorned with 4 doubled strands of kosher yarn, usually wool, but sometimes silk or rayon, that are tied in a ritual macrame which relates to the numerology of the Hebrew name for G-d. It is also a reminder of the central prayer of Judaism, "the Shema."

The Shema: "Hear, O Israel, The Lord, Our G-d, The Lord is One."

I'll explain, in English, what the Hebrew word for the name of G-d in the Shema, means. The Hebrew reads from right to left and is, "Yud-Hey-Vav-Hey". Each letter has a numerical equivalent. Yud = 10, Hey = 5, Vav = 6 and Hey = 5 again. If you add these numbers, you get 26. The word for G-d = 26. Add the 2 and the 6 and you get 8. G-d = 8. This symbology is tied into the tsitsit, the ritual fringe.

This is how you tie the macrame for the ritual fringe;
start with-2 double knots, then wind one long string around the remaining pieces of yarn, 7 times,
another double knot, then wind the string 8 times,
double knot, 11 times, double knot.

If you add up the number of windings at this point, 7 + 8 + 11 = 26. The 2 + 6 = 8 = G-d.

The last set of windings of the tstsit is 13, followed by the final double knot (which conveniently keeps it from raveling). This last set is related to the last word in the Shema,"Ehad" which means, "One".
The Hebrew for this word is "Ehad", Aleph = 1, Chet =8, Dalet = 4. 1 + 8 + 4 = 13. (1 + 3 =4)

Therefore, within the windings of the tsitsit, we have a sentence:

"G-d is One".

That is the reason the tsitsit are on the tallit. It serves as a visual reminder that everything is G-d. It all comes from the same source. There isn't anything that isn't G-d. And, if you can remember that and make it part of your day, part of your consciousness, then perhaps you will remember to treat everyone and everything as sacred.

If taken seriously, this would end war.

The final thing about all of this that I find so interesting goes back to the numerology. Numerology is a hobby of mine and I am always adding up the numerical equivalent of words to see how they relate to persons, actions, and states of being. Remember when I said that the Hebrew word for G-d in the Shema = 8? Well, the English word for God in numerology is, G = 7, O = 6, D = 4. Add it up. 7 + 6 + 4 = 17. 1 + 7 = 8. God = 8. Same as the Hebrew, but a different word. Very cool. It gets more interesting.

In numerology, the number 8 is defined as "material satisfaction".
What does our Bible teach us about G-d? G-d wanted to create something physical. G-d wanted a reflection of what was only a dream, a tangible, knowable something that would exist in form. Form has limitation, but when something has form, it becomes knowable. Creation is the way G-d gets to know the dream. And, since we are given form, we are part of G-d and can learn and know, too. The possibility within "material satisfaction" is always present as a way to understand more deeply. This is the gift given with each birth, a built in, hard wired innate aspect of Divine Order.
As I wrote previously, the word, "Ehad" in the Shema equals 13 and 1 + 3 = 4. The number 4 is defined as "Order, Limitation and Service". So, "G-d is One" is also a way of saying "material satisfaction is order, limitation and service". Think about what that means to you.

In English, the numerology for the word "One" is; O = 6, N = 5, E = 5, making a total of 16. Add 1 + 6 = 7. The numerological attributes of the number 7, often considered a holy number, is "Understanding and Analysis".

"G-d is One", or, "material satisfaction is order understood." If G-d wanted to understand what Is/Was/Will be, then you can understand where your own desire for that same thing comes from.
We are not separated from our Creator. We are of our Creator.

Isn't it amazing? I hope I have made this clear enough to understand the way I understand it at this time. There is mystical import to everything that exists and that ancient yearning to know and understand is built right in to every breath, every step, and every dream you make.

That's why I started to make tallitot. They are doorways into prayer.
To see a couple more of the tallit I have made, go to my website -

Saturday, August 06, 2005

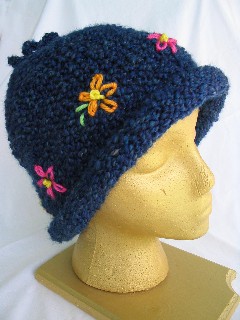
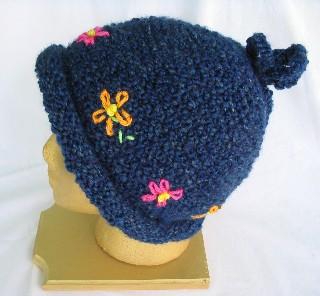
Blue Homespun Rolled Brim Knit Hat with Flowers


Blue rolled brim knit hat with flowers Posted by Picasa
Now I am happy with this hat!


I used pink, orange, yellow and green yarn, and a large eyed plastic needle to embroider right over the knitted fabric of the hat. It wasn't as easy to do as I expected. There are holes in knitted work and that makes it difficult to knot the yarns when beginning or ending a new color. I also had to be careful not to make the flowers too tight or dense so that the knit wouldn't be distorted when I put the hat on my head. This hat now has charm! I am looking forward to some trips to Denver to visit family and have an excuse to wear this hat.